Getting Started with Models Builder
Models Builder comes included in Umbraco 7.4 and out of the box it should just work, but what if you want more options? Below is a rundown of all the different modes for Models Builder and what they actually mean in terms of code.
I realise that there is some documentation and posts on this already, but this is aimed as a primer and how it worked for me.Enabling Models Builder permalink
In order to get Models Builder working, there is one key web.config update that you need to do.
<add key="Umbraco.ModelsBuilder.Enable" value="true" />
<add key="Umbraco.ModelsBuilder.ModelsMode" value="PureLive" />
If you set the first one to false, then it simply doesn't do anything and your site runs as before without any of the Models Builder stuff. The next one is important in terms of selecting which mode you want Models Builder to run in. There are quite a few options here, which I've tried to go through and offer the usage case for each.
PureLive permalink
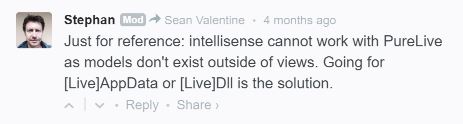
This is the default option with Umbraco and is designed as an easy way to get started. You shouldn't have to do anything clever and you will have strongly typed models in your views. Except that, this doesn't come with intellisense and you can't use them anywhere else apart from your views. This is all possible via some in memory compilation, at runtime.
The main point here is that it's really easy to edit your content types and templates from within Umbraco without the need for an application restart.
Dll Models permalink
This option generates the models within ~/App_Data/Models and then compiles them into a single dll, which is added to the bin folder of your website project. A compiled dll allows for intellisense and you can use it throughout your website project. Also, there are two options here: LiveDll and Dll mode. The first one updating (and causing an application restart) whenever content types are changed. The latter working as an opt-in update via the click of a button.
This one is mainly for working with Visual Studio and leaving as a dll and not much else.
AppData Models permalink
This option generates the models within ~/App_Data/Models, but they aren't added to a dll. If you want them compiled then you can include them within Visual Studio and get intellisense and use throughout the project. Again, two options: LiveAppData and AppData. Works the same as before.
Very similar to Dll mode but with a bit more selection over what gets compiled.
API Models permalink
This one is a little different in that it doesn't generate the models in the Umbraco website. You decide the location of where they are generated and then reference so that they can be used within your website project. It also relies on a Visual Studio extension and NuGet package (Umbraco.ModelsBuilder.Api) so that it can connect to your Umbraco instance. This means that it is up to you to update your models whenever a change is made to the content types. You probably don't want to generate models in the Umbraco website anymore either so it is advisable to set Umbraco.ModelsBuilder.ModelsMode to Nothing when using this method.
This is probably useful if you normally have a separate project for all your controllers, models, custom code, etc.
What to use? permalink
At this point in time, I'm thinking the option which is going to get used by myself is the API mode since this allows for a defined location and a separate project. However, it is also quite feasible that I would be keen to use the PureLive mode so that I can take advantage of making quick and easy updates without having to deploy or recompile any of the code.